With drywall covering most of the electrical wiring in your home, repairing damaged wiring might seem like a huge project. However, it is possible to splice together wiring without tearing open the entire wall. Whether your electrical wiring was damaged by rodents or by drilling into the wall, repair it as soon as possible to restore power to all fixtures fed by the damaged circuit. Not repairing the damage could lead to other problems, such as an electrical fire.
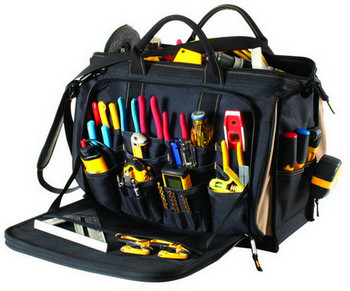
Things You’ll Need
- Tape measure
- Tone generator
- Probe
- Old work electrical boxes
- Drywall saw
- Wire cutter/stripper
- Fish tape
- Electrical connectors
- Screwdriver
- Wire nuts
- Electrical box cover plates
Turn off power
to the damaged electrical circuit by turning off the breaker that supplies it in
the circuit breaker panel.
Disconnect the wiring for the circuit in
question
from the circuit breaker. Clip the black wire from the tone generator on to either
the black or white wire from the circuit and ensure it is in
“tone” mode.
Push the button on the probe and move it along the wire. Follow the wiring toward the devices it powers until the tone stops. If you make it all the way to the devices, go back to the circuit breaker panel and clip the tone generator on to the other wire; the break is likely in that wire.
Follow the wiring once again toward the devices until the tone stops. This is where your break is located.
Measure the dimensions of your old work electrical box and mark out two locations approximately a foot apart along the path of the damaged electrical wire. Old work electrical boxes are special junction boxes that install into existing walls. They allow installation without opening up large portions of the wall and negate the need to locate wall studs.
Cut out the drywall at each of these locations large enough to accommodate the old work electrical boxes.
Cut the electrical wire at each of the holes. Remove the damaged portion from within the wall. Strip both remaining ends with your wire stripper. Remove approximately 2 inches of outer insulation and then strip the inner insulation to expose 1/2 inch of bare copper from each of the wires.
Slide one of the stripped ends into one of the
old work boxes and secure with an electrical connector. Slide the other
stripped wire into the other old work box and secure with an electrical
connector. Insert
your fish tape into one of the cut out holes on the wall and push it through the
wall toward the other hole. Once it emerges from the other hole, fasten a length
of electrical wire to the fish tape and pull it back toward the first hole.
This will draw your electrical wire through the wall. Once back at the first
hole, disconnect the wire from the tape. Strip the wire in the same fashion as
previously done and secure one end in each of the old work boxes.
Slide each old work box into one of the cut out holes in the drywall.
Turn the screw on each to lock in place.
Attach the wire nuts. Twist the black wires together in each box, the white wires together and the ground wires together. Screw a wire nut on each connection.
Screw an electrical box cover plate on to each electrical box. Reconnect the wiring to the circuit breaker and turn the power back on to the circuit.
TIPS & WARNINGS
- While a tone generator is a great tool for finding a break in the wall, it will also stop sounding its tone if you move away from the wire. This can make diagnosing a lengthy trial and error process since the tone will stop sounding at both the break in the wire and if you move away from the wiring in the wrong direction. If your tone generator stops sounding its tone, move the probe in different directions all over the wall to ensure you found the correct location of the break. Although this process can prove tedious, it may be preferable to ripping open entire sections of drywall.
- You cannot simply splice the wires within the wall. They need to be in an electrical box with a cover plate to provide future access to the splice point.